PDF to images — Steps and checked example
Checked: · ToolMiko
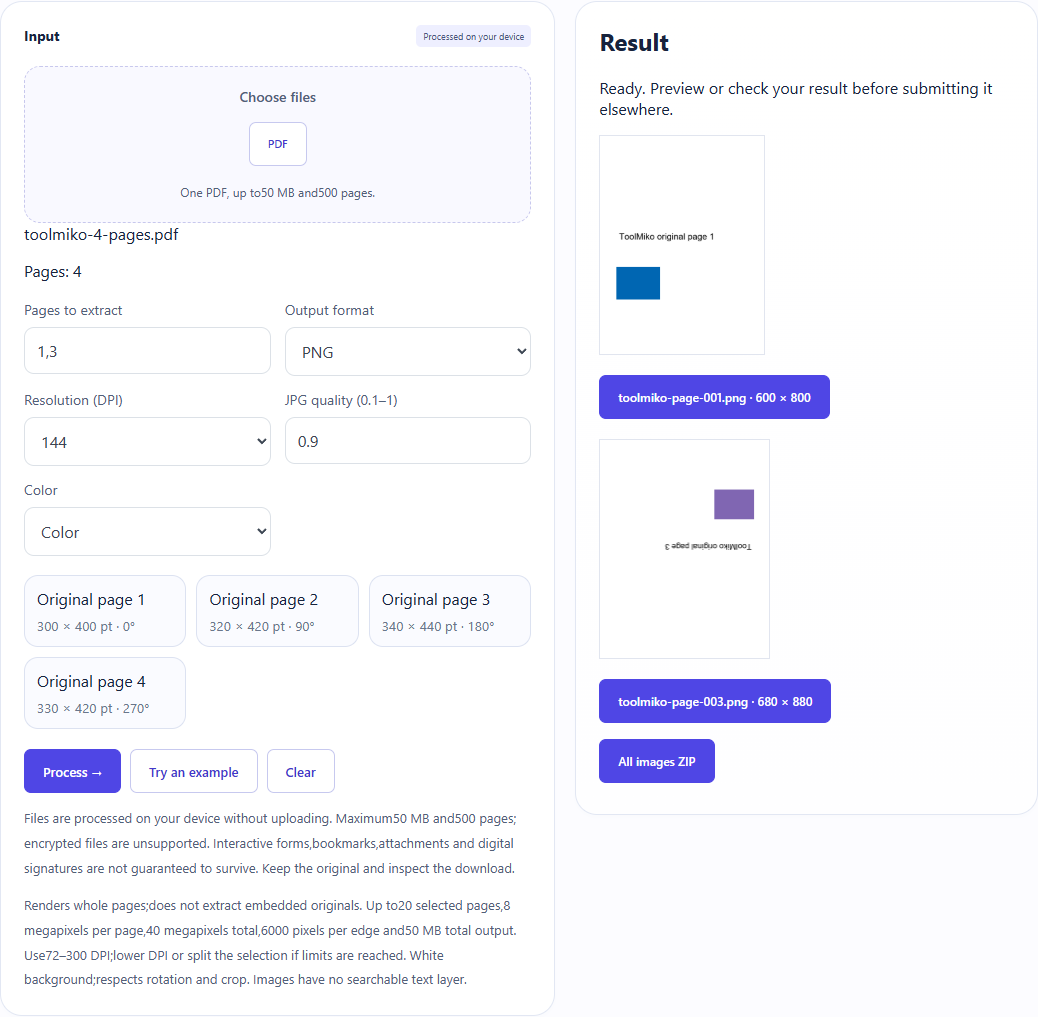
Select1,3 from the four-page fixture at144 DPI:two PNGs,600×800 and680×880 pixels.
PDF to images →Steps and checked example
- Choose an unencrypted PDF and wait for its page count.
- Enter pages or ranges (for example 1,3), choose PNG or JPG, DPI and color or grayscale. JPG also has a quality setting.
- Run, check image dimensions and clarity, then download individual images or the ZIP of all images.
Generated fixture and downloaded result
The sample contains no user files. Screenshots and downloadable results come from actual use of this tool.
Limits and checks
One PDF, up to50 MB and500 pages.
Files are processed on your device without uploading; the original PDF is not changed.
Renders whole pages;does not extract embedded originals. Up to20 selected pages,8 megapixels per page,40 megapixels total,6000 pixels per edge and50 MB total output. Use72–300 DPI;lower DPI or split the selection if limits are reached. White background;respects rotation and crop. Images have no searchable text layer.
PNG or JPG?
Try PNG for text and line art,and JPG with adjustable quality for photos. Both are page rasters,without PDF vectors or a searchable text layer. Convert images back to PDF →
Why can a higher DPI still look blurry?
More output pixels cannot restore detail missing from the original scan. Check the downloaded dimensions against the receiving system’s requirements. Lower DPI or process fewer pages when pixel limits are reached. Need text recognition? Image OCR →